Epoxy tumblers remain one of the most popular ways that crafters customize drinkware. With the right combination of glitter, decals, paint, and epoxy resin, you can transform a simple cup into eye-catching custom tumblers with a smooth, professional-looking finish.
In addition to offering great style and visual appeal, epoxy resin tumblers create depth, protect designs, and provide a polished look. These features make them stand out at craft fairs, online shops, and other settings, attracting customers with unique designs. From bold glitter styles to elegant marble effects, the custom designs you can create with epoxy are practically endless, especially when paired with sublimation and other printing methods.
Whether you are designing epoxy cups for personal use or building inventory for your business, experimenting with new styles can help your drinkware stand out and capture attention. For creative entrepreneurs, this means creating products that are highly memorable and original, thereby increasing sales.
If you are looking for fresh epoxy tumbler ideas for your next crafting project, these creative designs can help inspire your next custom cup. Below, we’ll explore 12 stunning epoxy tumbler ideas, including customization additions that will make your cups even more special.
 #1 Glitter Ombre Epoxy Tumbler
A glitter ombre epoxy tumbler is one of the most recognizable styles in custom drinkware crafting. Despite its popularity, it can still capture customer attention with its eye-catching blend of shimmer and color transitions. The gradual glitter fade creates a soft transition of color and sparkle beneath the glossy epoxy coating, giving the tumbler a highly stunning finish.
To create the ombre effect, tumbler makers add glitter heavily in certain areas while gradually blending it into lighter coverage across the entire tumbler's surface.
This layered application technique helps create a seamless fade rather than a harsh line between colors. Some crafters also combine multiple glitter shades in the transition area to produce a softer gradient effect. Once sealed beneath tumbler epoxy, the glitter gains additional depth, dimension, and shine that enhances the overall appearance of the finished design.
You can use both fine and chunky glitter to create different visual effects. Fine glitter typically produces a smoother, softer fade, while chunky glitter creates a more textured and dramatic sparkle beneath the epoxy resin. Many crafters combine both glitter sizes to add extra dimension and visual interest to the tumbler.
#2 Marble Epoxy Tumbler
A marble epoxy tumbler creates a smooth, stone-inspired appearance that gives custom drinkware a clean and upscale look. It's a great option for crafters because it combines elegant patterns with the glossy depth of epoxy resin.
Tumbler makers often use classic black-and-white marble designs when creating the marble effect, but you can also use gold veins, metallic accents, or darker jewel tones for added contrast. These style choices give the appearance of polished natural stone after the curing and drying process.
To achieve the marble effect, you will need to build the design in multiple layers, giving the tumbler more depth and dimension. After applying the base coat, crafters typically add a second coat using paint or alcohol inks, gently swirling the colors together to create natural-looking movement across the surface. From there, you might also add veins to mimic the appearance of actual marble.
Once the epoxy is applied and cured, the final design should look polished and multidimensional with a smooth, glass-like finish.
#3 Floral Epoxy Cups with Pressed Flowers
Creating floral tumblers with pressed flowers creates a delicate, nature-inspired look that feels both artistic and timeless. These are especially popular for gifting because each tumbler features naturally unique flowers and organic patterns that you can tailor to specific color palettes or occasions.
To start, you will need to carefully dry and press real flowers before adding them to your tumbler. Properly drying the flowers is one of the most important parts of the process because fresh flowers contain moisture that can cause browning, mold, discoloration, or curing issues beneath the epoxy resin. Many crafters press flowers between heavy books or use flower presses for several days to multiple weeks until the flowers become completely flat and dry.
After the flowers fully dry, use tweezers to arrange them carefully on the tumbler before sealing them. Some crafters also incorporate additional decorative elements, such as fine glitter, metallic flakes, gold leaf, vinyl decals, or watercolor-style backgrounds, to enhance the overall design.
Floral epoxy tumblers are perfect for weddings, spring collections, and boutique-style custom drinkware. The natural textures of the flowers combined with the glossy epoxy finish create a soft, elegant aesthetic that stands out at handmade markets.
#4 Wood Grain Tumbler
With wood grain, you can give your tumblers a natural, rustic appearance that resembles real stained wood sealed under a glossy finish. This design is especially suitable for masculine-themed drinkware and rustic boutique styles because it combines the warmth of natural wood tones with the shine of epoxy resin.
You can create the wood-grain effect by starting with a lighter base color such as beige, tan, cream, caramel, or light brown. This lighter layer acts as the underlying “wood” color that will show through the darker grain lines later in the process. Once the base coat dries, darker shades of brown, walnut, black, or amber are lightly layered over the surface to begin building the grain pattern.
Additionally, you can enhance the effect by dragging, feathering, or streaking the darker paint while it is still wet. Many crafters pull brushes, gloved fingers, or silicone combs in long vertical strokes to mimic the flowing appearance of real wood grain. Slight curves, uneven streaks, and natural-looking imperfections help make the pattern appear more realistic because real wood is never perfectly straight or uniform.
To increase realism even further, some crafters deepen certain sections with darker accents, smoky shading, or black alcohol inks before sealing the design beneath epoxy resin. Plus, add metallic pigments or mica powders to create a richer stained-wood appearance.
This design is great for epoxy crafting because the resin creates a smooth, polished surface that enhances the illusion of real wood.
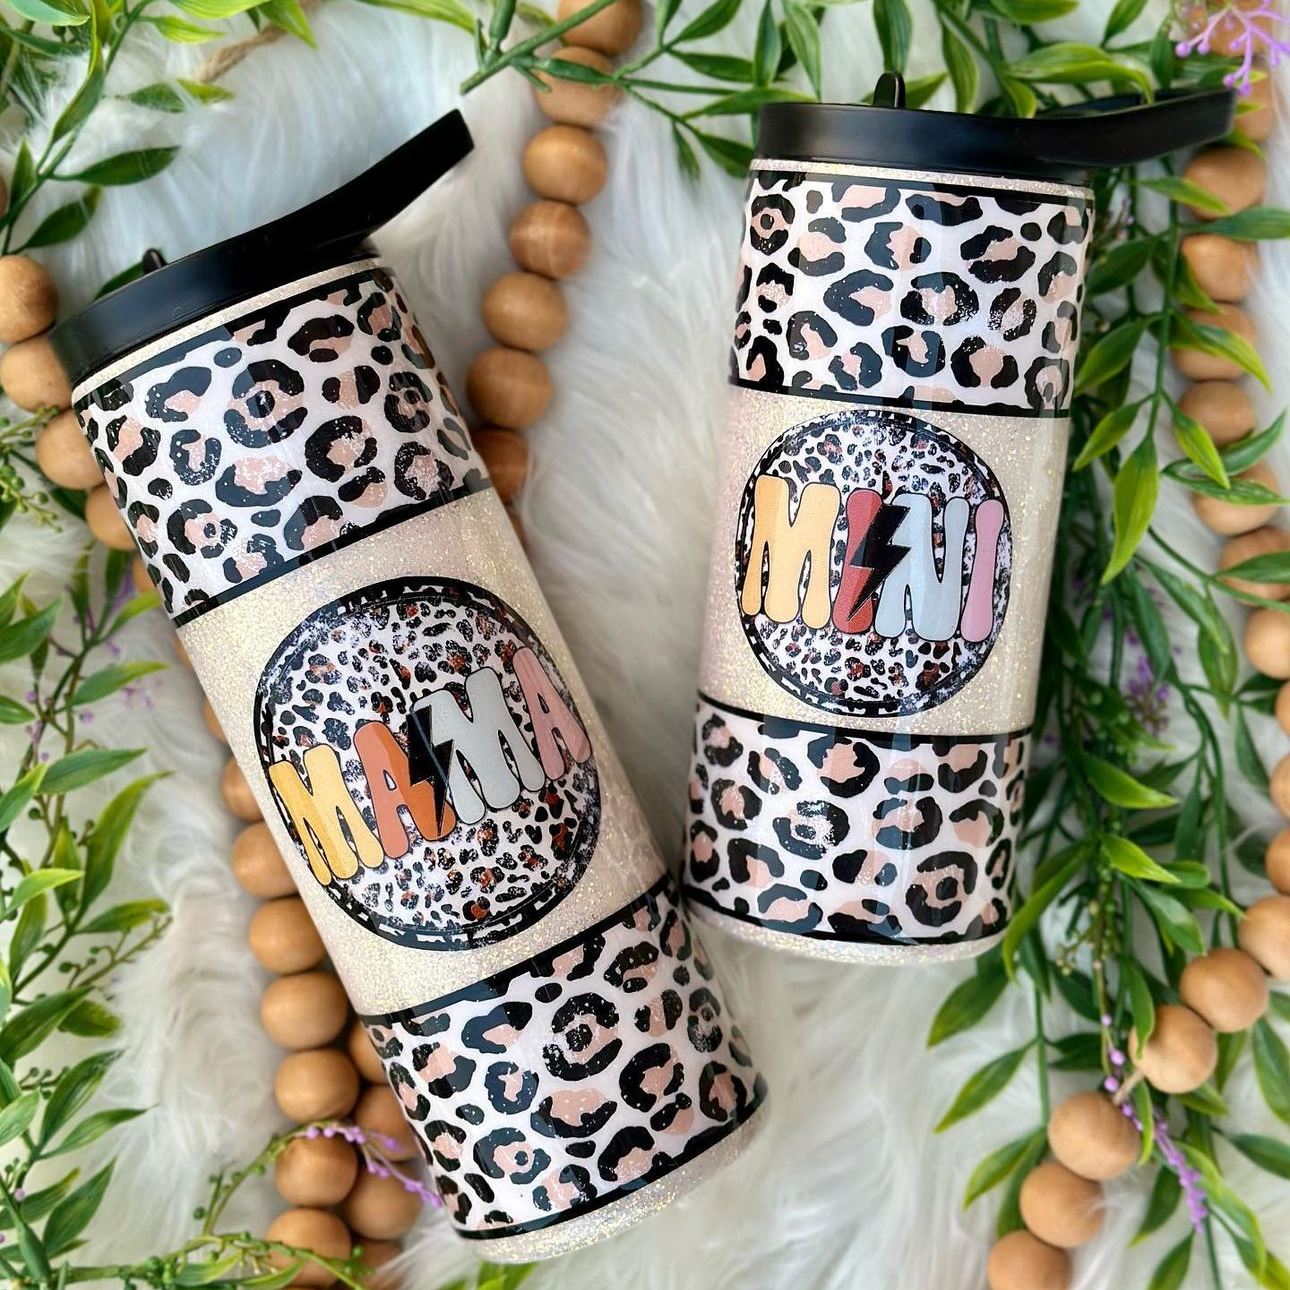
 #5 Leopard-Print Glitter Tumbler
Leopard-print glitter tumblers are highly eye-catching because they blend fashion-inspired animal prints with a sparkling base. This gives the final custom tumbler a boutique-style look without requiring complex crafting techniques.
Most crafters build this effect by layering a glitter foundation first, using warm metallic and neutral tones, such as gold, champagne, bronze, tan, rose gold, or copper. Crafters often use fine glitter to create smoother coverage, while others mix fine and chunky glitter for additional sparkle and texture. After applying this base coat to your tumbler, seal it with epoxy.
Next, add irregular spot patterns. To create a realistic animal-print appearance, crafters typically begin by painting random tan, caramel, or brown blobs across the tumbler surface. These spots are intentionally varied in both size and spacing because real leopard print is naturally irregular and uneven. Some spots are clustered closely together, while others are spaced farther apart to avoid creating a repetitive pattern.
After the base spots dry, add black accents and outlines around portions of the shapes rather than tracing full circles. This broken-outline technique is one of the key details that helps the design resemble authentic leopard markings. The black markings should appear imperfect, uneven, and slightly jagged, rather than smooth or symmetrical. Many crafters also add small, standalone black marks between larger spots to create a more natural flow throughout the design.
Finally, apply epoxy across the entire surface to create a smooth, glossy finish and polished appearance.
#6 Drip-Style Epoxy Resin Tumblers
Drip-style tumblers are highly distinct because they create the illusion that paint or glitter is melting and flowing down the surface of the cup. This design gives the tumbler a bold, modern appearance that feels artistic and slightly abstract, allowing crafters to experiment with a wide variety of colors, finishes, and layered effects to create highly unique drinkware designs.
The effect usually begins with a solid-colored, painted, or glitter-coated base that contrasts with the drip design layered over it. Glitter bases are especially popular because the reflective sparkle shows through the drips and adds depth once sealed with epoxy resin.
Before creating the drip effect itself, most crafters apply a thin seal coat over the glitter or painted base to smooth the surface and prevent the drip colors from bleeding or blending unintentionally.
After you seal the base layer, you can carefully apply thicker paint or glitter around the upper rim or in selected sections of the tumbler. Gravity naturally pulls the material downward into uneven streaks and trails, creating the signature dripping appearance. You can also use a silicone brush or stir stick to stretch or shape individual drips while the material is still wet.
You'll then apply multiple thin coats of clear tumbler epoxy over the entire surface to smooth and unify the design. This step is especially important because raised drip edges and layered paint textures can create an uneven surface beneath the resin. The epoxy fills in and levels around the drips, gradually creating a smooth, glass-like finish while still preserving the layered appearance underneath.
#7 Geode Epoxy Tumbler Designs
Geode designs are inspired by natural crystal formations and are known for their layered, dimensional look. This epoxy tumbler idea is popular because it combines bold color, metallic detail, glitter, and crystal-like textures in a stunning way.
Most geode-style epoxy tumblers begin with a deep, dramatic base color such as black, navy, emerald green, dark purple, or charcoal gray. These darker backgrounds help create contrast and allow the brighter glitter and metallic elements to stand out more clearly. From there, crafters begin building the geode effect by creating curved or flowing sections that imitate the layered rings and fractured crystal formations found in real geodes and agate stones.
To achieve this effect, you can use glitter, mica powders, alcohol inks, metallic pigments, and faux crystal chips, which you can apply in separate bands rather than blending them together. Place each layer beside the next to form irregular, crystal-like sections with visible contrast between colors. You can use fine glitter to create shimmering “stone” areas, or chunky glitter to imitate the textured sparkle of crystal clusters found inside real geodes.
You can also add metallic accents such as gold, silver, rose gold, or copper between the layers to mimic mineral veins and fractured stone lines. These metallic outlines help define the separate crystal sections and create the sharp, structured appearance that makes geode tumblers so visually striking.
#8 Epoxy Sublimated Designs
Combining epoxy with sublimation printing can empower you to create vibrant, eye-catching tumbler surfaces that are also glossy and smooth. You can seal full-color sublimated designs under a smooth, glass-like coating for added durability and shine.
Crafters begin this process by printing a sublimated design, wrapping it around a sublimation blank, and bonding the design to the surface using heat and pressure from a heat press or sublimation oven.
If you're interested in learning all about sublimating tumblers, check out our full guide "How to Do Sublimation Printing."
After applying the sublimated design, you can apply a clear layer of epoxy resin to add depth and give the cup a polished, professional appearance. With this added shine, the sublimated tumbler can reflect light, making its colors appear even richer and more saturated.
 #9 Beach-Themed Epoxy Tumblers
Beach-themed epoxy tumblers are designed to capture the look and feel of ocean water, sand, and shoreline textures. Beach-inspired tumblers create a calm, coastal aesthetic that works well for vacation drinkware, gift sets, and seasonal collections.
To achieve the beach effect, crafters usually build the tumbler design in separate sections rather than blending the entire surface at once. Most designs begin with a diagonal shoreline because angled beach layouts tend to look more natural and visually dynamic than straight horizontal divisions.
After completing the sandy section, you can layer darker blues and teals farther from the shore to imitate deeper ocean water. Additionally, blend lighter aqua and seafoam shades closer to the beach design to resemble shallow water near the shoreline.
You'll also likely want to include a wave effect. Add white pigment paste or white alcohol ink between the water and sand section to imitate ocean foam. Many crafters use air-blowing techniques, brushes, or silicone tools to gently push and stretch the white pigment outward into irregular wave patterns. This creates soft foamy edges and lacing effects that resemble real waves washing onto the beach.
You can also enhance the illusion of sunlight reflecting on water by incorporating iridescent glitter, holographic flakes, or fine shimmer pigments throughout the ocean sections. These reflective materials catch light beneath the epoxy, creating a sparkling effect reminiscent of real ocean water.
#10 Hand-Painted Epoxy Tumbler Designs
With hand-painted tumblers, you use your blank cup as a miniature canvas for your one-of-a-kind designs. You can use your creativity and skill to create stunning patterns, colors, and original artistic details before sealing everything under epoxy resin.
When hand-painting tumblers, most crafters use acrylic paint, alcohol inks, or pigment-based paints. Regardless of the paint type, you will apply the colors directly to the tumbler surface. You'll likely use multiple layers of paint, allowing each layer to dry before adding more details.
Designs can range from soft watercolor blends to bold abstract brush strokes, depending on the desired look. Plus, you can add metallic accents to create contrast and highlight specific areas of the design.
Once you complete your painted design, seal it underneath your epoxy resin to enhance color depth and protect your artwork.
Hand-painted epoxy-glitter tumblers often appeal to customers looking for one-of-a-kind drinkware. Each piece carries slight variations in brushwork and texture, making every finished cup truly unique.
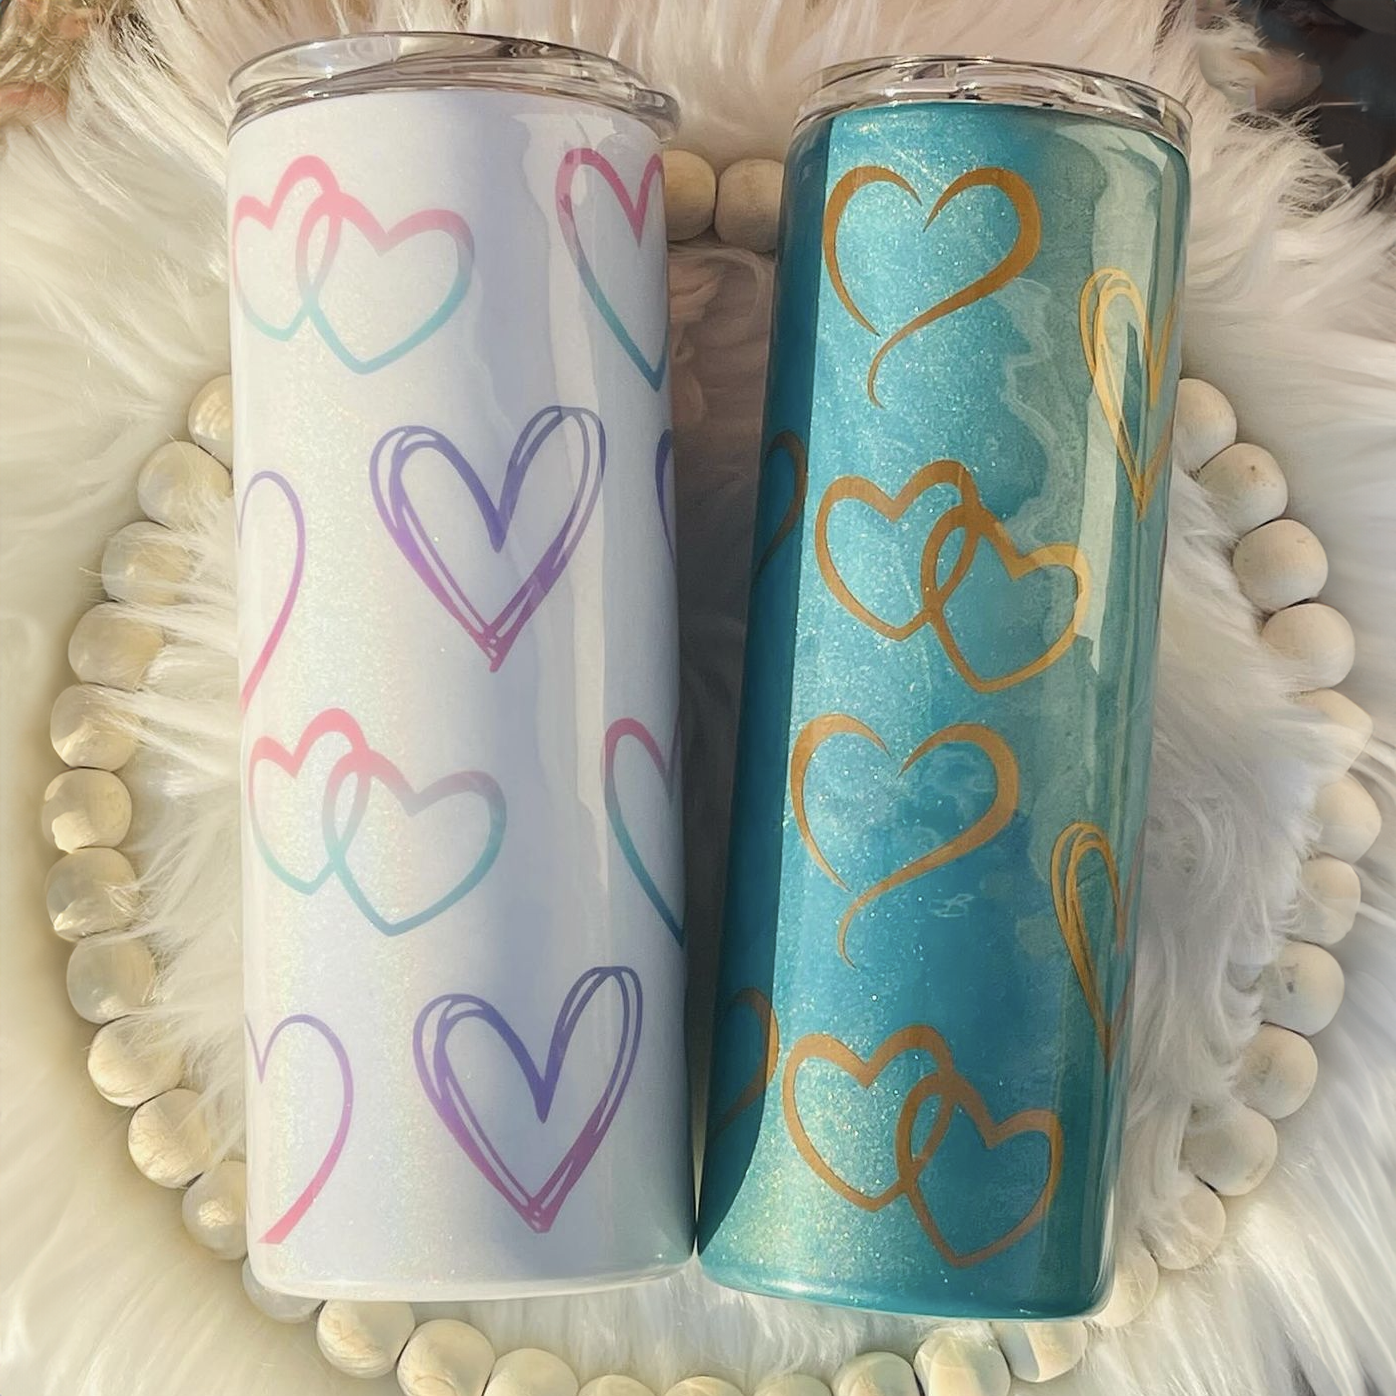
#11 Combine Epoxy with Vinyl Decals
Pairing epoxy with vinyl decals is one of the most common and effective techniques for crafting custom tumblers. It allows tumbler makers to combine personalized graphics with a durable, high-gloss finish.
Vinyl decals make it possible to add names, monograms, logos, quotes, and intricate artwork beneath the smooth epoxy resin coating, giving the finished tumbler a clean, professional appearance while still allowing for extensive customization.
Most crafters begin with a painted, glittered, or lightly textured base layer that complements the decal design. If you use glitter or textured materials, you'll then apply a thin initial epoxy coat to create a smooth surface for the decal.
Once the base layer is smooth and fully cured, apply the vinyl decal carefully to the tumbler using transfer tape. Smooth the decal outward from the center using a scraper or squeegee tool to remove trapped air and ensure the edges fully adhere to the tumbler surface.
After applying the vinyl layer, apply additional thin coats of tumbler epoxy over the entire surface. These epoxy coats seal and protect the decal while gradually smoothing the raised vinyl edges into the surrounding surface.
If you want to learn more about using vinyl decals for tumbler crafting, explore our guide "How to Apply Vinyl Decals to Tumblers."
#12 Galaxy Glitter Tumbler
A galaxy glitter tumbler uses layered color, reflective glitter, and translucent epoxy to create the illusion of depth, almost like looking into a miniature night sky sealed beneath glass. The design works best when the colors stay slightly separated instead of fully blended, allowing different shades and sparkle levels to stand out through the epoxy.
After the base dries, begin building the galaxy effect in sections. Dabbing metallic blue, violet, teal, or magenta paint onto random areas with a sponge creates soft clouds of color resembling nebulae. The key is to leave visible dark spaces between sections so the brighter colors appear suspended against the background rather than covering the entire tumbler.
You can then add fine holographic glitter to create a scattered star field across the tumbler. Next, place chunky iridescent glitter or reflective flakes more selectively to mimic brighter stars and clusters.
Instead of distributing glitter evenly, concentrate heavier sparkle in certain areas while leaving others darker and more open. That uneven spacing is what makes the design resemble deep space rather than a standard glitter tumbler.
Once you get the glitter right, you can add white pigment or diluted white acrylic paint to create the signature cloudy galaxy streaks. Crafters often lightly dab or swirl the white over sections of color before softening the edges with a gloved finger, sponge, or small brush. Under epoxy, those faded white areas resemble glowing cosmic gas clouds.
The final result creates a bold, multidimensional tumbler design that feels immersive, dramatic, and completely unique from one cup to the next.
Now that you know these 12 ideas for creating unique epoxy tumbler designs, let's unpack common questions crafters have when getting started with epoxy.
 Epoxy Tumbler Ideas FAQs
What Epoxy Projects Sell Best?
Custom tumblers are among the best-selling epoxy projects, especially glitter tumblers, marble designs, galaxy cups, and personalized drinkware with names or logos. These styles sell well because they combine eye-catching finishes with customization, making them popular for gifts, events, and everyday use.
What Is a Good Epoxy for Tumblers?
A good epoxy for tumblers is a clear and food-safe resin that cures to a hard, glossy finish that won't yellow over time. Tumbler crafters use epoxy resin designed specifically for drinkware because it is safe while providing strong durability, smooth leveling, and scratch resistance.
What Kind of Paint Do You Use on Epoxy Tumblers?
Crafters most commonly use acrylic paint when customizing epoxy tumblers, but alcohol inks, pigments, and mica powders are also popular, especially for creating unique effects such as marble, geode, watercolor, or galaxy-inspired finishes.
What Do I Need to Apply Epoxy to a Tumbler?
To apply epoxy to a tumbler, you will typically need a tumbler turner or cup turner, mixing cups, stir sticks, gloves, and a heat gun to remove bubbles from the epoxy surface. Many crafters also use rubbing alcohol to clean the tumbler before applying epoxy, as it helps remove dust, oils, and other residues that could affect adhesion and the final finish.
Order Epoxy Crafting Supplies and Stainless Steel Tumblers Today
With epoxy tumbler crafting, your creative possibilities are nearly endless. When you use the design ideas we've discussed, combined with small adjustments in color, texture, layering, and technique, you can create highly original drinkware for personal use or resale.
As you experiment with different materials and styles, you can continue developing new epoxy cup ideas that reflect your creativity and help your tumblers stand out.
If you are a tumbler crafter or creative entrepreneur, you can get great deals on epoxy supplies through The Stainless Depot Company. We offer epoxy resin, mixing bowls and stir sticks, gloves, and stainless steel tumblers, all perfect for epoxy crafting. These supplies can empower you to achieve the best tumbler customization results.
With the right epoxy tumbler ideas and supplies, you can create truly stunning drinkware. You can start experimenting with these design ideas today to craft eye-catching custom tumblers for personal projects, gifts, craft fairs, or small business sales.